
You can paint your Nerf gun in a weekend and have it come out looking like a prop, not a craft project. The difference is not talent. It is doing 12 small steps in the right order, and knowing which ones you cannot skip.
This is the whole tutorial on one page, with the video for every stage.
What is on this page
- Everything you need to paint your Nerf gun
- The only paints that stick to a blaster
- Step 1. Before you paint your Nerf gun, take it apart
- Step 2. Sand it
- Step 3. Dremel and blast marks
- Step 4. Clean it
- Step 5. Primer
- Step 6. The base coat
- Step 7. Tape and mask
- Step 8. The accent coat
- Step 9. Mist for metal
- Step 10. Stencils
- Step 11. Details and weathering
- Step 12. Clear coat
- Mistakes to avoid when you paint your Nerf gun
- Where to buy what you need to paint your Nerf gun
- Frequently asked questions
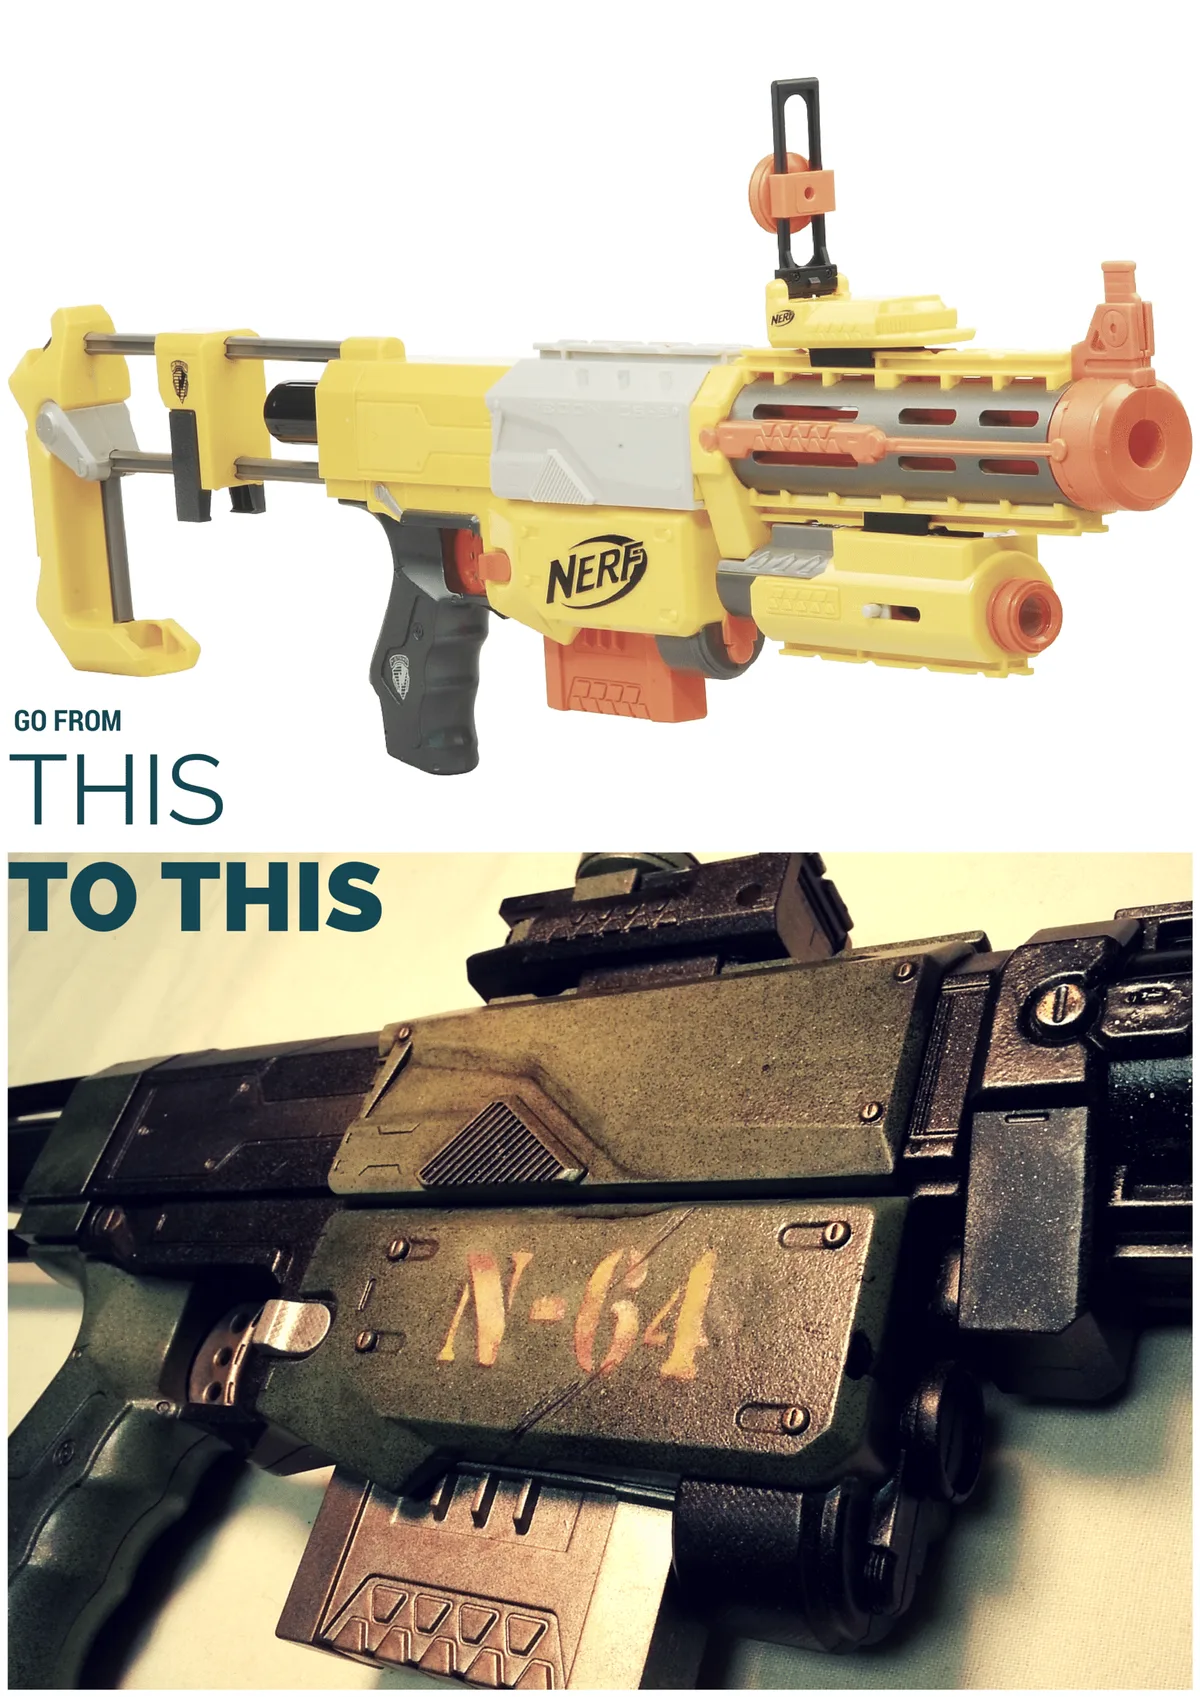
That is the finish this guide builds. Metallic base, green accents, weathering ground into the edges. Nothing here needs an airbrush or a spray booth.
Everything you need to paint your Nerf gun
Every step below repeats its own supplies. This is the whole shop list in one place, so you can buy everything you need to paint your Nerf gun in a single order.
- A long precision screwdriver, plus a jar for the screws
- Sandpaper in 100 and 220 grit, silicon carbide
- A rotary tool with a cone bit and a pointed grinding stone, plus safety glasses
- A round file, if you are not buying a rotary tool
- Water, a sponge, an old toothbrush, and rubbing alcohol or mineral spirits
- A microfiber cloth for drying
- Plastic primer, or a paint-and-primer-in-one made for plastics
- Flat white or flat black spray paint for the base coat
- Your accent color, plus 2 contrasting colors for misting
- Painter’s tape, 1 inch to 2 inch
- A hobby knife, scissors, and clear packing tape for stencils
- Acrylic paints, a small detail brush, an angled brush and a tray
- A clear coat in matte or gloss, same brand as your colors
- Gloves, a thin board to lay the pieces on, and good light
Buy the sandpaper and the tape first. They are the two things people try to substitute, and both substitutions show up in the finished paint.
The only paints that stick to a blaster
The first thing to get right when you paint your Nerf gun is the can itself. Not every spray paint works here. Blaster shells are molded plastic, and standard hardware-store enamel sits on top of that plastic instead of bonding to it. It chips off the first time the shell flexes.
Two categories bond properly:
- Plastic-bonding spray paint, the kind sold as paint and primer in one for plastics. This is the beginner-friendly route.
- Vinyl dye, for vinyl and fabric parts like slings and straps. It soaks in rather than coating.
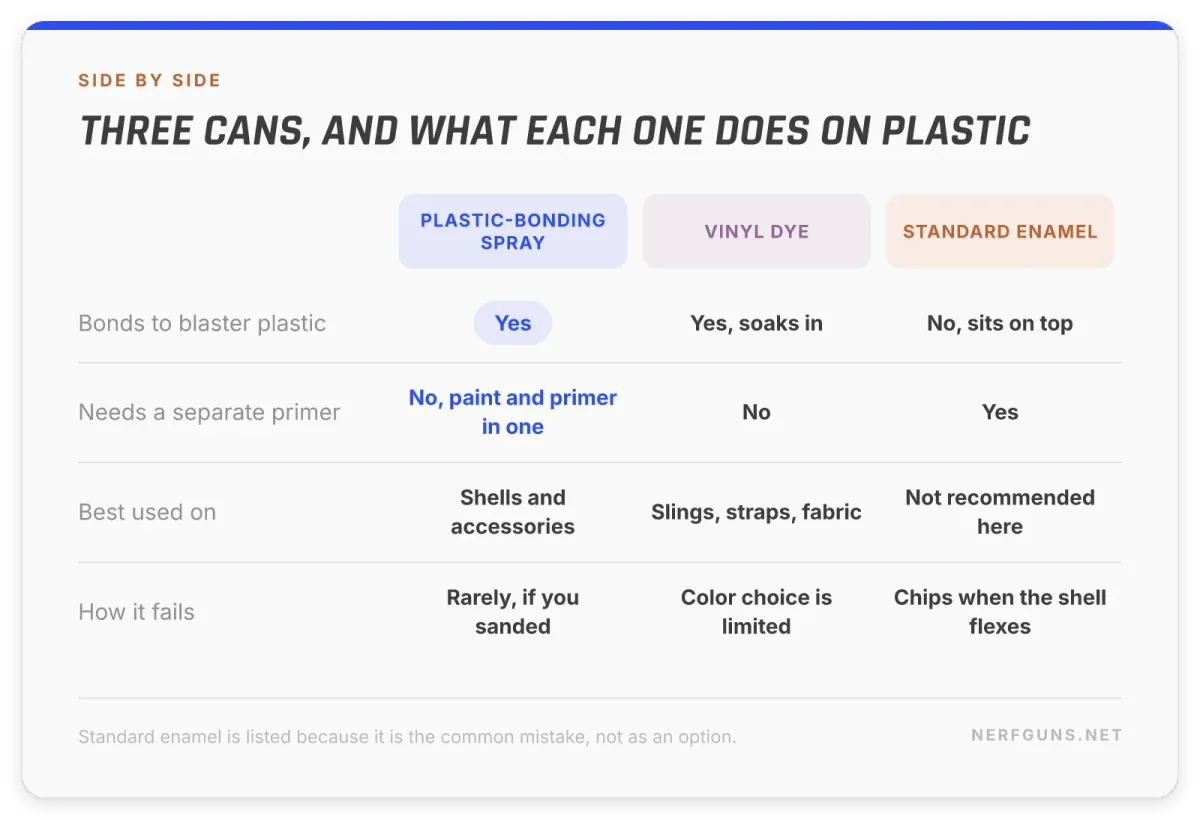
Here is the thing. The plastic-bonding route lets you skip a separate primer, which saves a step and a can. The trade is less control over the base color, because you are buying whatever shades that product line offers.
Step 1. Before you paint your Nerf gun, take it apart
Pick a blaster you can reassemble, get the shell halves off, and be honest about what level you are painting at.
The viral paint jobs you have seen took their makers years of practice. Treat your first attempt as the experiment it is. You will find out whether you like grinding blast marks or laying down clean accent lines, and that tells you what to do next time.
There is no single correct method here, which is why searching for one is frustrating. Some painters use only brush-on acrylics. Some use only rattle cans. Both produce good work.
Pick the right first blaster
The Recon is a good first candidate. It is cheap on the used market, and it comes apart and goes back together without a fight. Read our Recon CS-6 breakdown before you open it.
Take the shell apart with a screwdriver and drop every screw into a jar. Photograph the internals as you go. When you reassemble in two weeks, those photos are the only thing standing between you and a spring on the floor.
Paint the shells only on your first build. Paint on the internals gums up the mechanism, either straight away or later when it starts to flake.
What look are you going for?
If you have no idea what to paint, pick a genre and steal from it. Blasters already read as futuristic, which is why they work as film props. Steampunk, dieselpunk, and any video game you like are all fair game. The build in this tutorial takes its cue from military science fiction, which is why it lands on a metallic base with hard green accents.
Step 2. Sand it
Roughing the shell is what makes the paint last. Skip it and the job fails in a month.
Rushing this is the most common way to paint your Nerf gun badly. Sanding creates microscopic gouges for the paint to grip. Painters call it creating tooth. It takes about 15 minutes of light work, 100 grit then 220 grit. Stop when the shine is gone and the color has gone slightly pale.
Do not lean on it. If you are producing more plastic dust than progress, you are pressing far too hard.
The full walkthrough, including how to get into the detail lines and which grit actually cuts plastic, is here: how to sand your Nerf gun.
Step 3. Use a rotary tool and add blast marks
Grind off the logo and cut in the damage that makes it look used. About 20 minutes.
A molded logo is the single biggest giveaway that a prop is a toy. A rotary tool takes it off in about a minute.
Wear safety glasses. Plastic fragments come off this at speed.
Bits, speed and the burning smell
A cone bit with a rounded edge grinds a logo flat without gouging around it. A pointed stone cuts the impact craters.
Run the tool at about half speed. High speed melts the plastic instead of cutting it, and it smears rather than grinds. If you smell burning, your speed is too high. Every tool is geared differently, so test on the inside of a shell half where nobody will see it.
No rotary tool?
A round file removes a logo perfectly well. Start with a coarse file to take off most of it, switch to a fine one, then finish with sandpaper.
Making damage that tells a story
Press the pointed stone in to make the impact point, then grind streaks outward from it for the ricochet. Put a mark where the logo used to be if that patch came out uneven, which turns a flaw into a feature.
Keep your free hand behind the bit, not in front of it.
Sand the loose plastic curls away when you are done. Anything still hanging on will lift off later and take your paint with it.
Step 4. Clean your nerf gun
Sanding dust and finger oil both stop paint sticking. About 15 minutes.
This looks like the skippable step. It is the one that quietly ruins more attempts to paint your Nerf gun than any other. Dust left in the tooth you just sanded means the paint bonds to dust instead of plastic.
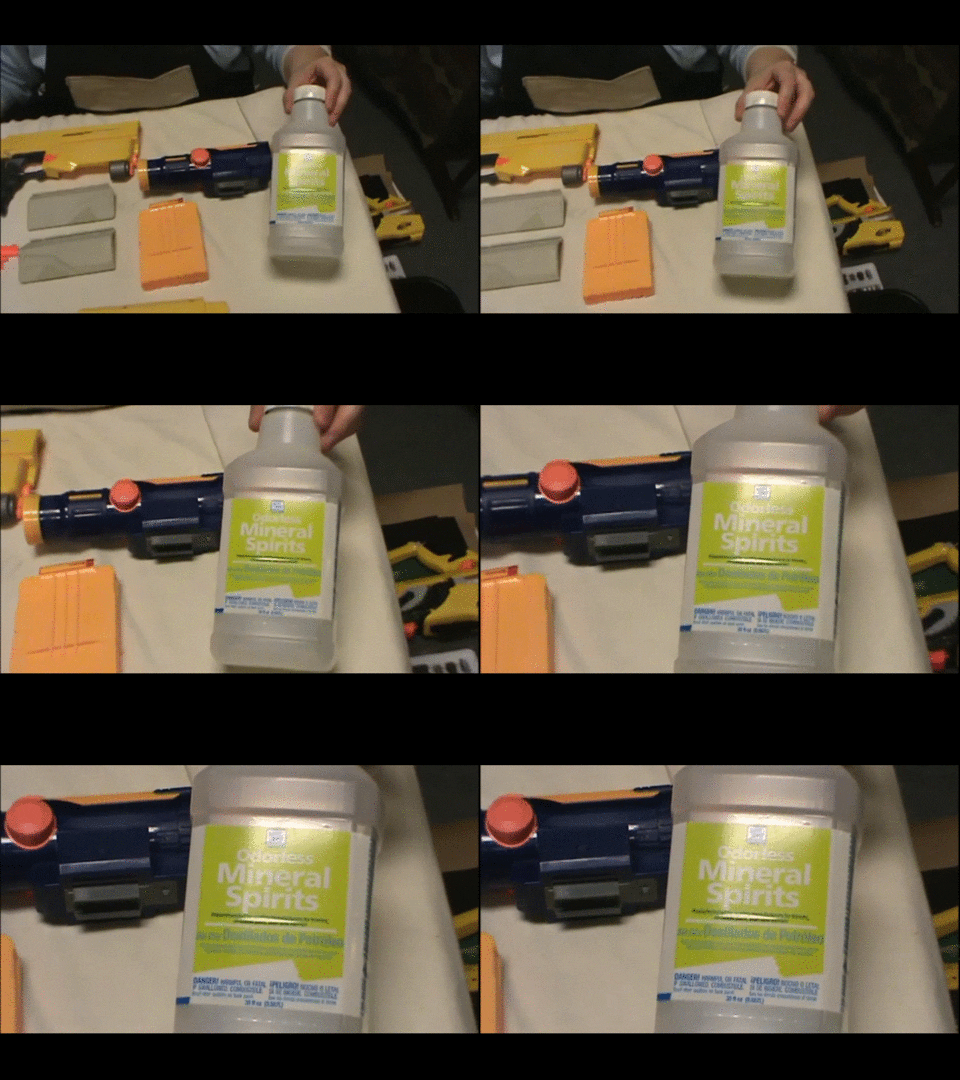
Soap, water and a sponge handle most of it, with an old toothbrush for the detail lines. If you want to be thorough, wipe the shells with rubbing alcohol or odorless mineral spirits first, then wash. That removes mould-release residue and the oil off your fingers.
Dab dry with microfiber, do not rub. Rubbing a cloth over freshly sanded plastic leaves fibers stuck in the tooth. Then let the pieces air dry completely.
Tape the clip mouth and the scope lens now, before any paint comes out. Paint where the darts travel will cost you feeding reliability.
Step 5. Add primer
Primer is the blank canvas. Two thin coats, sanded between.
Primer gives your color an even surface to sit on, so the finish reads as one material instead of patches. Skip it only if the can you bought to paint your Nerf gun is a paint-and-primer-in-one. If you bought a paint-and-primer-in-one for plastics, use that here and treat it as your primer coat.
The overspray method
Start the spray off the edge of the piece, sweep across it, and release after you have passed it. Never start or stop the can over the shell. That single habit is the difference between an even coat and a run.
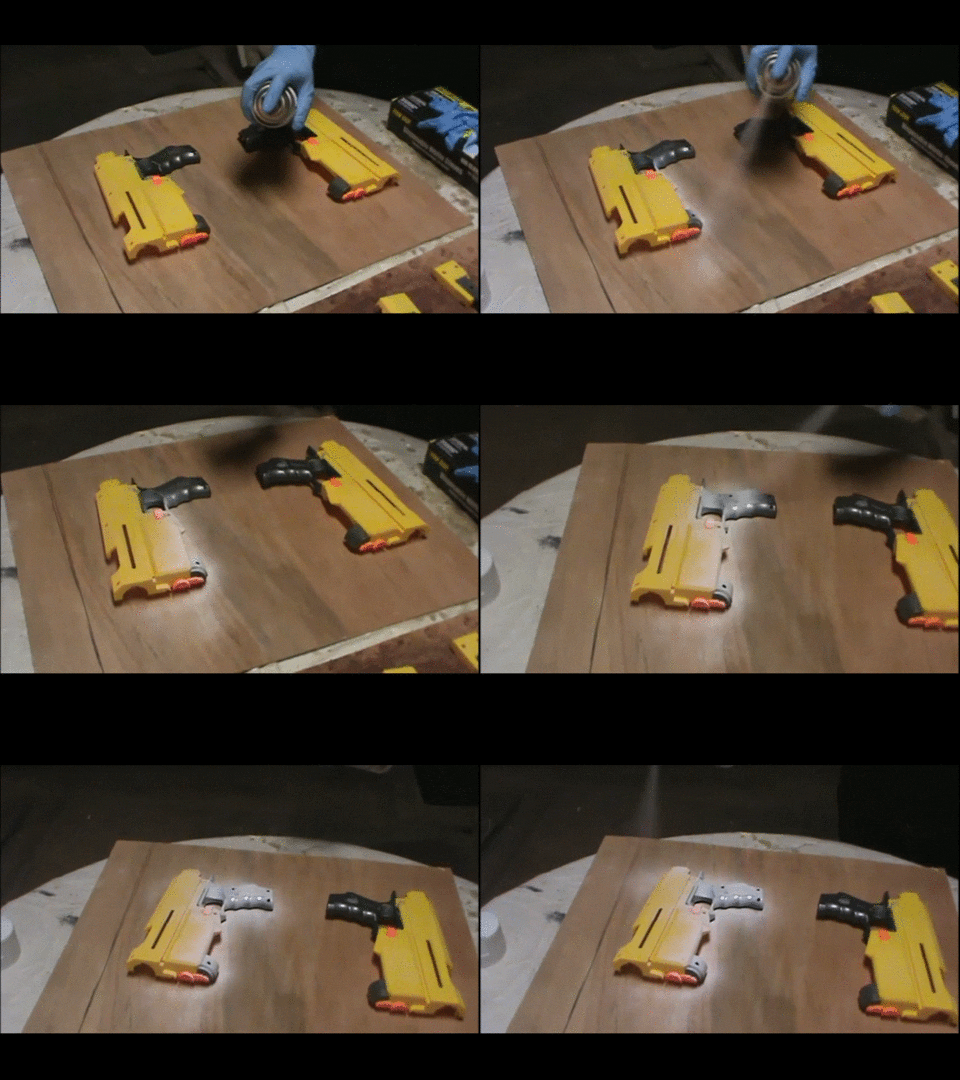
Move the can from the elbow, not the wrist, so the distance stays constant. Use short bursts and build up. One heavy pass makes goops that stay tacky for days and look cheap forever.
If you get a run
Finish the coat and let it dry properly. Then sand the run flat and carry on. It is a 5 minute fix, not a disaster.
The step most people skip
Lightly sand between each dry coat of primer, then wipe with a damp rag and let it dry. It is more work. It is also the single biggest factor in how long the finish survives being handled.
Two coats of primer means sanding twice. That is the whole cost.
Step 6. Add the base coat
Your base color decides whether the blaster reads as metal or as plastic from the future.
This is a real decision, not a preference:
- Flat black gives you a realistic, heavy, metallic result. Everything you mist on top reads as worn alloy.
- Flat white gives you a clean, bright, science-fiction result. Colors laid over white stay vivid.
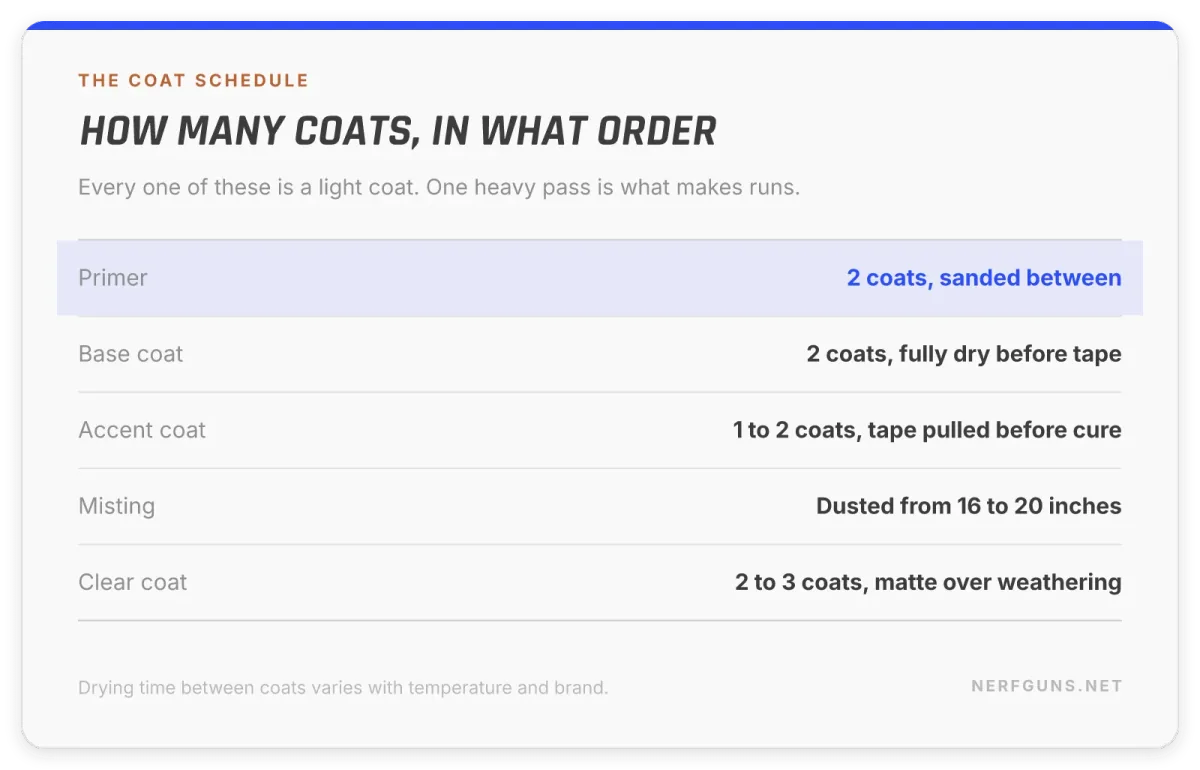
Two light coats, same short bursts, same overspray method. Make sure the base is fully dry before any tape touches it, or the tape will lift it.
Step 7. Tape and mask for the accent color
Tape is what keeps the second color where you want it.
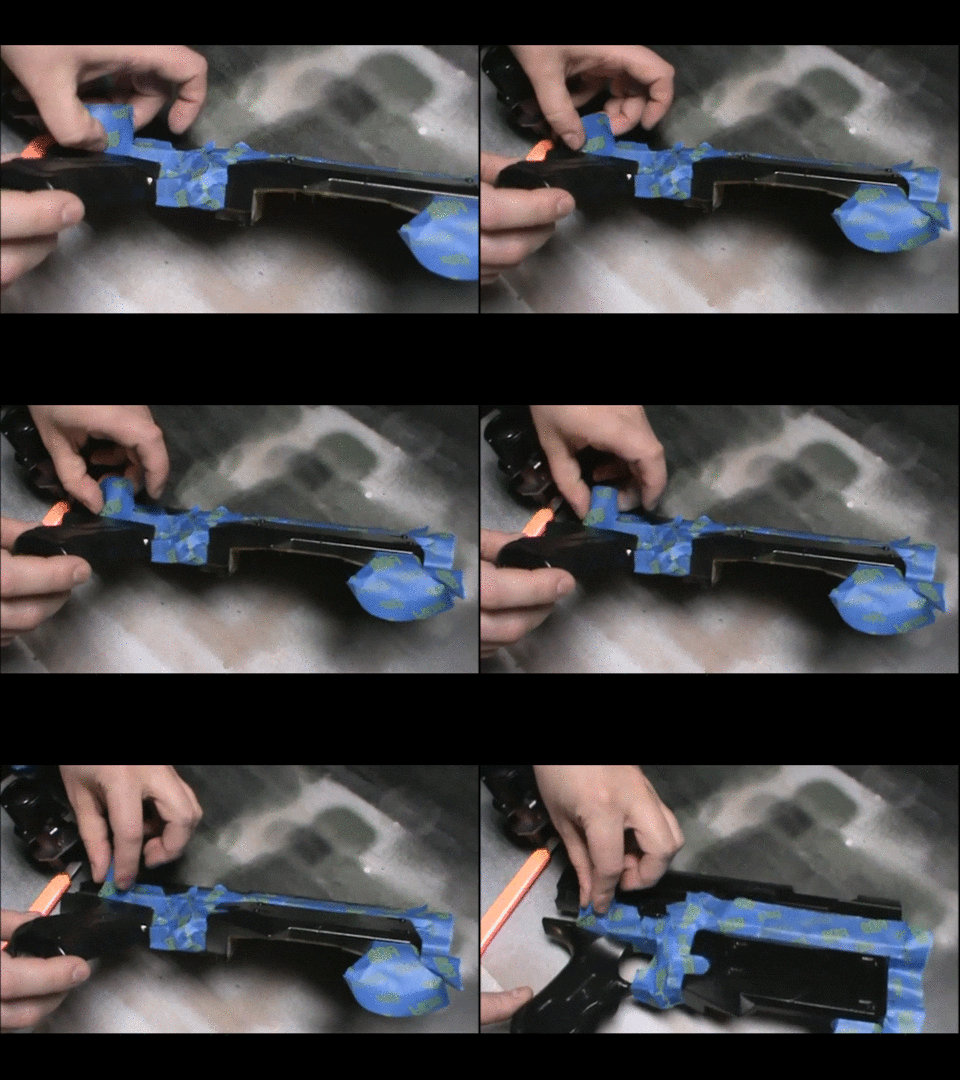
You do not have to mask the entire blaster. You only need a boundary wide enough to catch the overspray that misses.
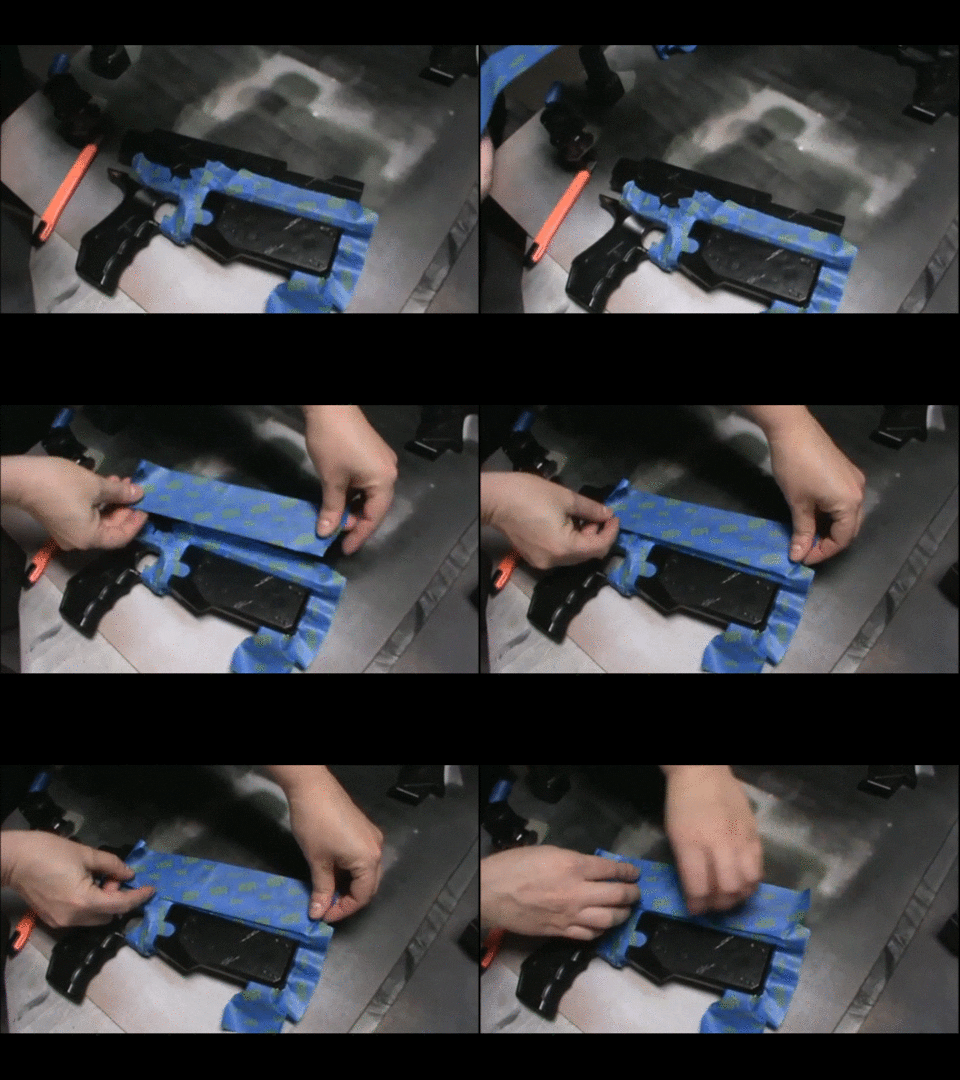
Use short pieces around curves rather than fighting one long strip. Press the edge nearest the spray down firmly with a fingernail, and leave the rest loose. Firm everywhere means the tape pulls your base coat off on removal.
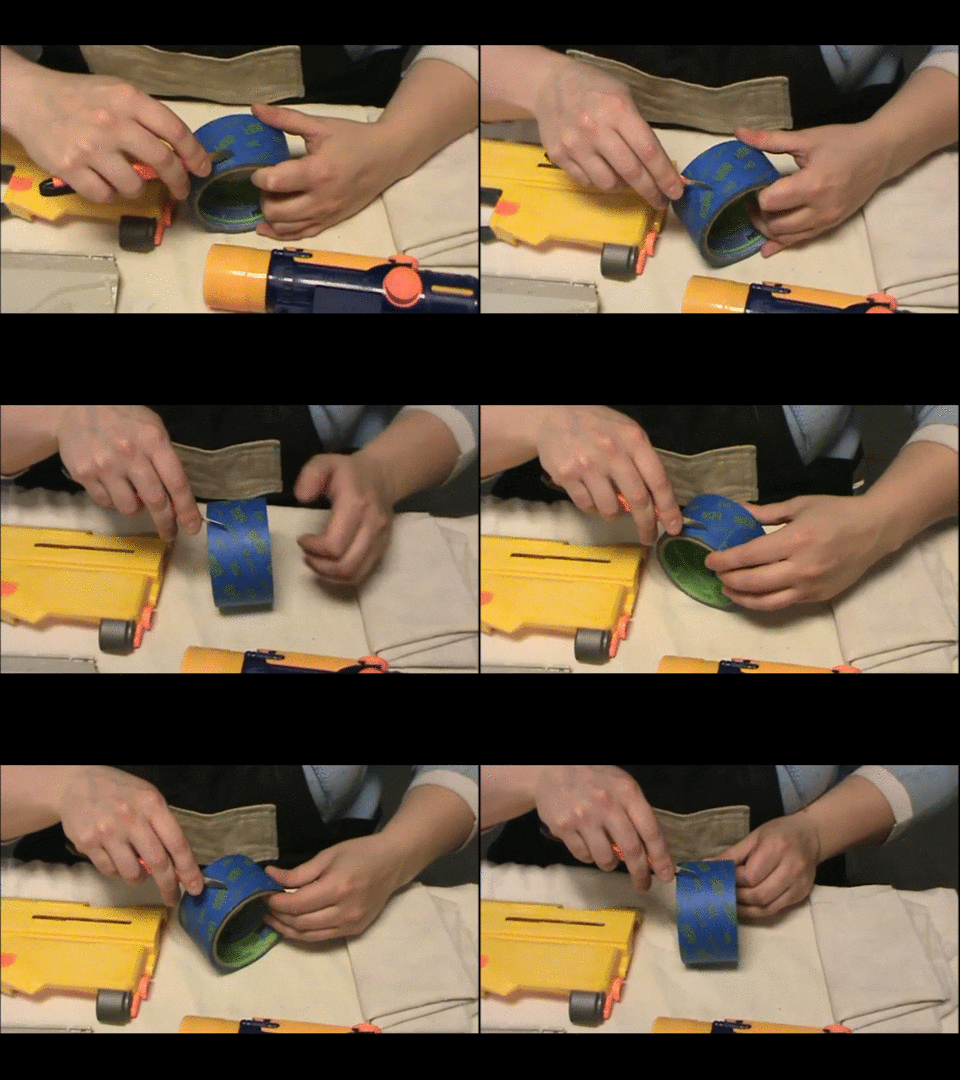
Cut precise shapes with scissors or a hobby knife. For the scope lens, mask it completely.
Pull the tape before the paint fully cures, and pull it away from the painted area. Tape left on overnight bonds to the finish and tears the line you were protecting.
Step 8. Add the accent coat
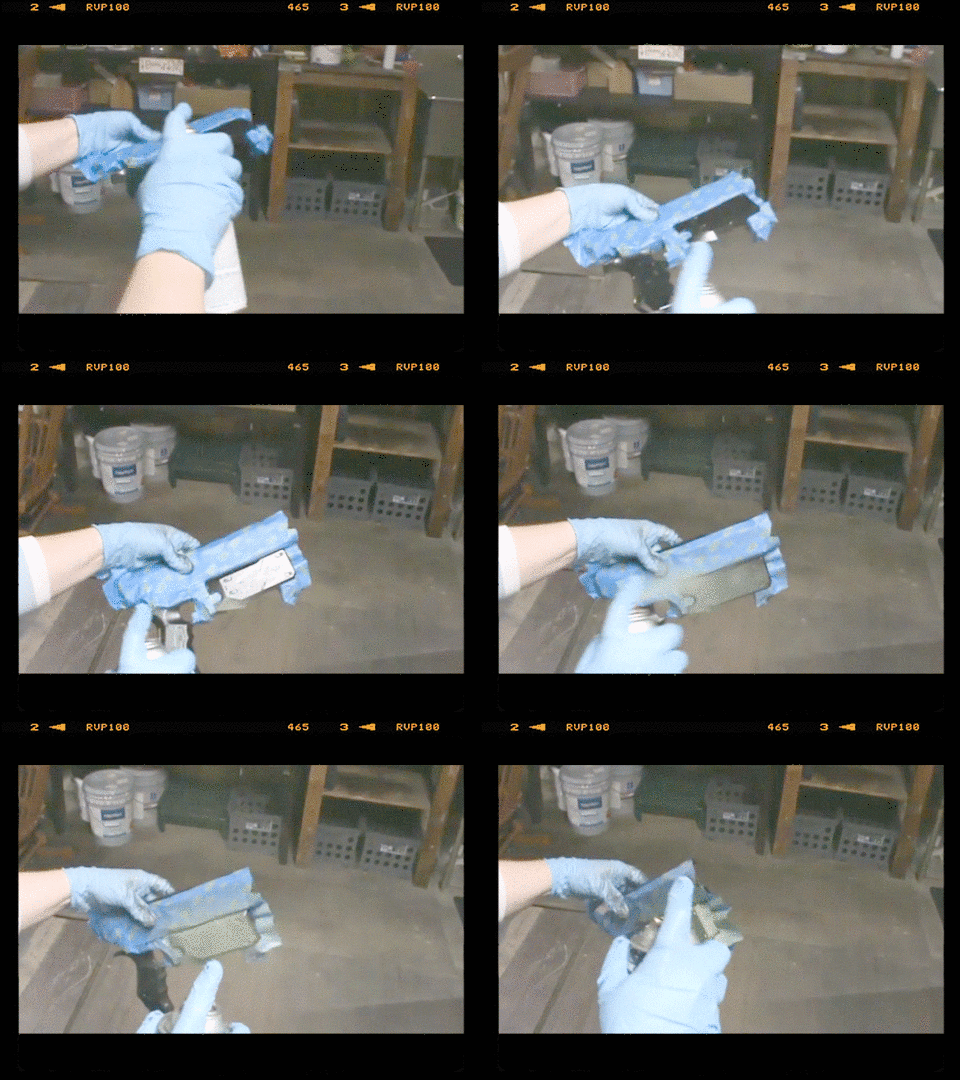
The second color is what stops it looking like a rattle-can respray.
Same technique as the base, with more care about where the overspray lands. Everything that misses should hit tape.
Missed a spot? You have options, and none of them are starting over:
- Cover it during the detail step.
- Let it dry, re-mask, and respray the base color over it.
- Leave it. Weathering hides a lot.
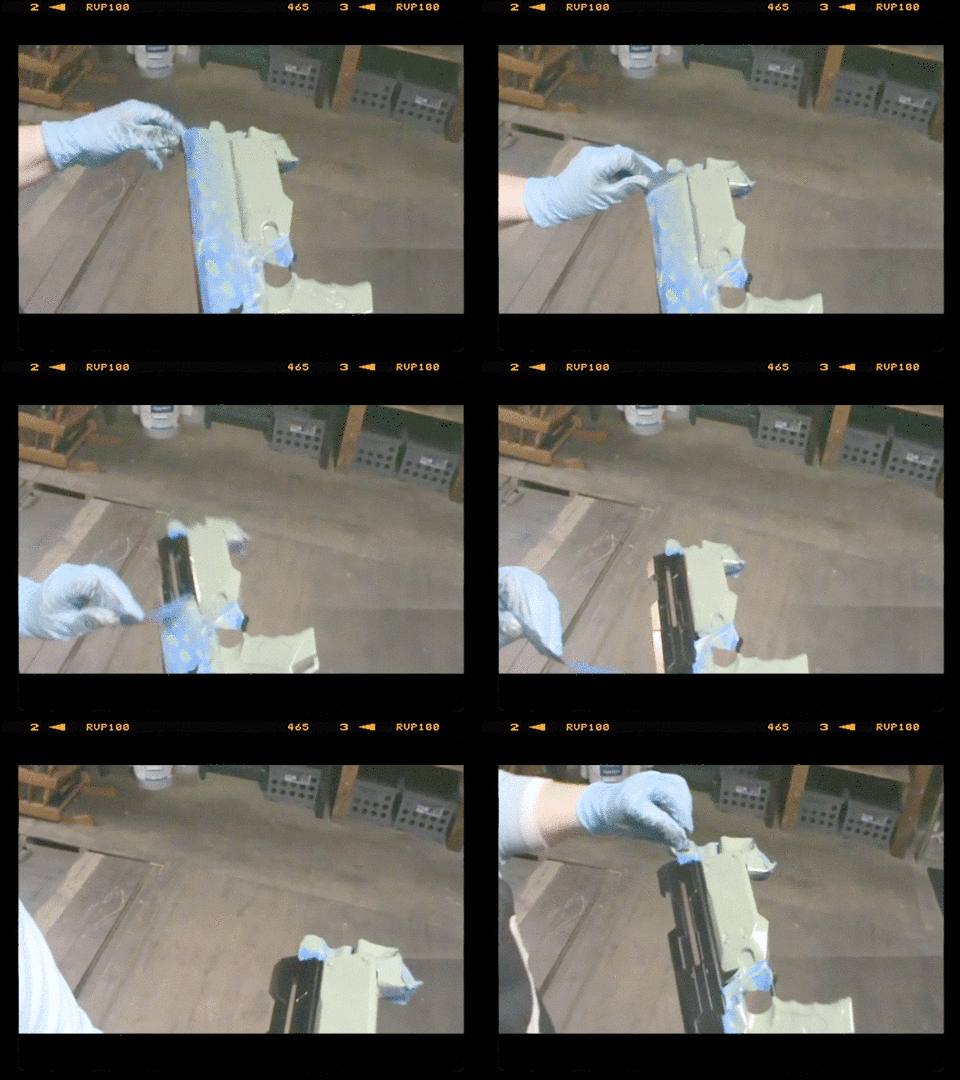
Then set the pieces out to dry. In a cool garage that is an hour or more.
Step 9. Mist for a metallic finish
Misting is the trick that makes cheap plastic read as machined alloy.
Hold the can 16 to 20 inches back, much further than normal, so only the dry edge of the spray pattern lands. You are dusting the surface, not coating it.
Two contrasting colors work best. This build used black and brushed nickel. The half held on the right in the video is unmisted, and the difference in how the light sits on it is the whole point.
Misting also knocks the sheen down, which is what you want under weathering. Give it an hour to dry.
Step 10. Use stencils
Print, laminate, cut, then pounce the paint on. Stencils are what make it look issued rather than homemade.
Set your lettering in any word processor at 48 to 72 point and print it. Measure the panel first so the insignia fits.
Cutting it
Cover the printout front and back with clear packing tape, working from the center out and flattening bubbles with a thumbnail. That laminate is what stops the stencil going soggy when paint hits it.
Cut the interior out with a hobby knife. Go slowly, hold it like a pencil, and keep every other finger behind the blade. If you are under 18, have an adult do the knife work. Ruin one and you print another, so there is no reason to rush.
Painting through it
Hold the stencil flat and pounce the color on with a stiff brush or a small sponge. Dab the brush off on a rag first, because a loaded brush bleeds under the edge. Stipple two thin passes rather than one wet one.
Step 11. Add the details and weathering
This is the step that sells it. Weathering gives a flat shell depth and age.
There are two routes, and you can mix them:
- Metallic wax, rubbed on with a fingertip and buffed back with cloth. It catches raised edges the way real wear does.
- An acrylic wash, which is acrylic paint thinned with clear polycrylic. Cheaper, and it flows into recesses where grime would collect.
Gloss polycrylic makes the wash shinier, satin keeps it neutral.
Where to put the wear
Put it where a real object would wear: raised edges, corners, around the grip, the muzzle, and inside the blast marks you ground in at step 3.
- Dry brush a lighter metallic along edges, then blend the strokes away with a fingertip
- Float a darker wash into cracks and panel lines to make the shell read as 3-dimensional
- Use a small detail brush for screw heads, levers and lettering
- Build in 2 light passes rather than 1 heavy one
Clean the brushes with mineral spirits, and get the wax off your fingers with warm soapy water.
Step 12. Protect your nerf gun with a clear coat
The last step, and the one that decides whether any of this survives a war.
Clear coat seals the weathering in. Without it, the wash and the wax rub off on your hands within a few games, and all the work you did to paint your Nerf gun goes with them.
Gloss reads as new and factory-fresh. Matte reads as used and issued. You just spent a whole step making the blaster look worn. Matte is almost always the right call, because gloss fights the weathering you just did.
- Match the clear coat brand to your color paint brand
- Apply 2 to 3 light coats, never one heavy one
- Let each coat dry fully before the next
- Clear coat every painted piece, including the small ones
Put it back together
Pull up the photos you took at step 1 and reassemble. Work slowly around spring-loaded parts. That is the last thing you do when you paint your Nerf gun, and it is the step where a rushed job costs you a spring.
Mistakes to avoid when you paint your Nerf gun
Every one of these has been done, mostly by us. They are the 7 ways to paint your Nerf gun badly.
- Skipping the sanding. The paint looks perfect for 3 weeks and then peels in sheets.
- Painting the internals. Flakes of dried paint in the plunger tube is a repair, not a touch-up.
- One heavy coat instead of three light ones. Runs, long cure times, and a soft finish that dents.
- Leaving the tape on overnight. It bonds and tears the edge you were protecting.
- Rotary tool at full speed. Melted plastic smears instead of grinding, and it cannot be sanded flat.
- Painting the clip mouth. Darts stop feeding cleanly and you will not work out why.
- No clear coat. All the weathering rubs off onto your hands.
Where to buy what you need to paint your Nerf gun
As an Amazon Associate I earn from qualifying purchases.
Nothing here is exotic. Most of it is a hardware store run, and the rest is one order:
- Plastic-bonding spray paint on Amazon
- Silicon carbide sandpaper on Amazon
- Painter’s tape on Amazon
- Rotary tool kits on Amazon
- Metallic finishing wax on Amazon
- Matte clear coat on Amazon
Need a cheap donor blaster to practice on before you paint your Nerf gun for real? Cheap blasters on Amazon are the low-risk way to learn. A used Recon costs less than the paint.
Bonus tip: this supply list makes a great gift list. Nobody ever guesses paint. Put the sandpaper, the tape, the clear coat and a cheap donor blaster on a free Nerf wish list, and the people asking what you want get one link instead of a shrug. Everything you need to paint your Nerf gun, in one place.
Frequently asked questions
How long does it take to paint your Nerf gun start to finish?
Plan on a weekend to paint your Nerf gun properly. Working time is about 4 hours. Drying time is what stretches it across a weekend, because primer, base, accent, misting and 3 clear coats each need to cure before the next.
Do I have to sand if I use a paint-and-primer-in-one?
Yes. Even the manufacturers of plastic-bonding paint recommend scuffing the surface before you paint your Nerf gun. It is 15 minutes against a finish that lasts years instead of weeks.
Can you paint your Nerf gun without taking it apart?
You can, and it will look like it. Masked-off assembled blasters leave paint lines along every seam, and overspray gets into the mechanism. Teardown is 20 minutes.
Is it safe to paint a blaster you still use in games?
Yes, as long as you keep paint out of the barrel, the clip mouth and the internals, and you clear coat it. Check your local field rules first, because some events require a blaze-orange muzzle tip to stay visible.
What paint should I not use?
Never paint your Nerf gun with standard hardware-store enamel that is not rated for plastics, and never put anything oil-based over an acrylic wash. Both sit on the surface and chip at the first knock.
My paint went tacky and never dried. What happened?
Almost always too heavy a coat, or spraying in high humidity. Let it cure for a few days in a warm dry place. If it is still soft, sand it back and rebuild in thinner passes.
What comes after you paint your Nerf gun for the first time?
Once you paint your Nerf gun, most people move to the mechanical side next. Our guide to internal Nerf mods covers spring upgrades and air restrictor removal, and hydro dipping is the other route to a patterned finish.
It’s Nerf or Nothin’!