
Most people build a modders toolkit backwards, starting with a soldering station and a screwdriver that fits nothing. You can open every blaster you own for the price of one bad impulse buy. Here is the exact bench list, in three groups, in the order you will actually reach for them.
What is on this page
- Group 1: before you open anything
- Group 2: putting it back together better
- Group 3: buy these once you know you are staying
- What a modders toolkit actually costs
- Your first teardown, start to finish
- Three things that are not on this list
- The order I would buy in
- Mistakes that cost people a blaster
- Gear for this checklist
- Frequently asked questions
Gunner here. I get the same message every couple of weeks. Somebody has watched a mod video, they are ready to open up their first blaster, and they want to know what to buy.
Then they order a fifty dollar soldering station and a screwdriver that is the wrong size for every screw in the thing.
So here is the list. This is what is actually on my bench, split into three parts. The stuff you need before you open anything. The stuff that puts it back together better than it was. And the stuff you buy later, once you know you are staying.
Treat every blaster like a project in the shop. Take it apart, find the weak spot, upgrade the part, put it back together properly.
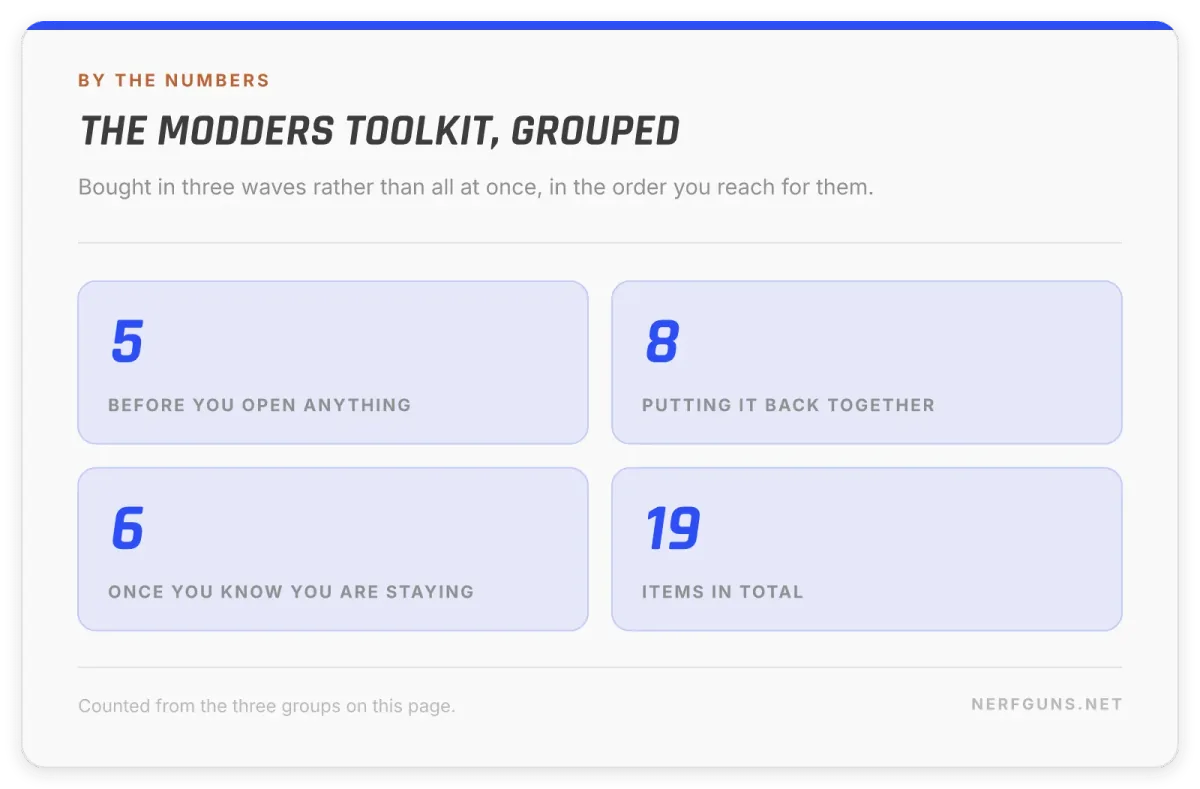
One thing before the list. A modders toolkit is not a shopping trip. It is three shopping trips spread over about a year, and the groups below are those trips in order.
Group 1: before you open anything
You cannot skip any of these 5. This is the difference between a modded blaster and a bag of parts, and it is where every modders toolkit starts.
- A precision screwdriver set. This is the one thing people get wrong first. Nerf blasters use small Phillips screws, and a normal household screwdriver will cam out and round the head off. Once a screw head is rounded you are drilling it out. Get a set with a proper PH0 and PH1, and a handle you can put pressure on.
- Safety glasses. You are going to be cutting spring steel and flicking plastic across the room. Wear them. I do not care how many times you have done it.
- A parts tray, or an ice cube tray. A blaster teardown produces 12 to 20 screws in three different lengths. They are not interchangeable. Put each group in its own compartment as it comes out. This one costs almost nothing and saves the most time.
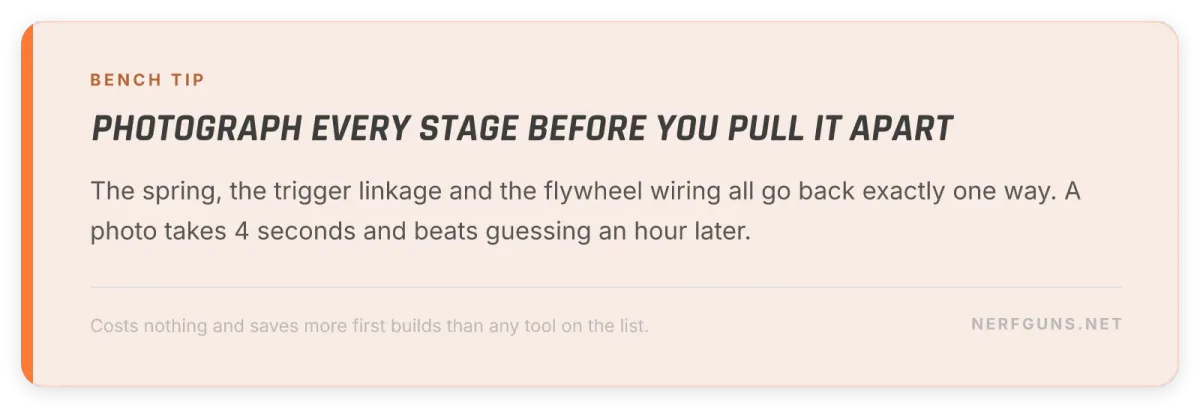
- Your phone, on a stand. Photograph every stage before you pull it apart. The spring, the trigger linkage, and the wiring on a flywheel blaster all go back exactly one way. A photo takes 4 seconds and beats guessing an hour later.
- A hobby knife. For flash on molded parts, trimming shell material, and opening the seam on glued shells. A fresh blade, not the one that has been in the drawer for years.
Notice what is not in group 1. Nothing here is electrical and nothing here is expensive. That is deliberate, because your first job is simply getting inside without breaking anything.
Group 2: putting it back together better
This is the group that turns a teardown into a mod. Everything in group 1 gets the shell open, and everything here decides whether the blaster comes back stronger than it went in.
This is also the half of a modders toolkit that people skip straight to, which is exactly why so many first builds end up glued rather than fixed.
- Flush cutters. For trimming zip ties, cutting wire, and clipping the plastic air restrictor posts out of the barrel. Regular side cutters leave a stub, and a stub in an air path is a performance loss you will never track down.
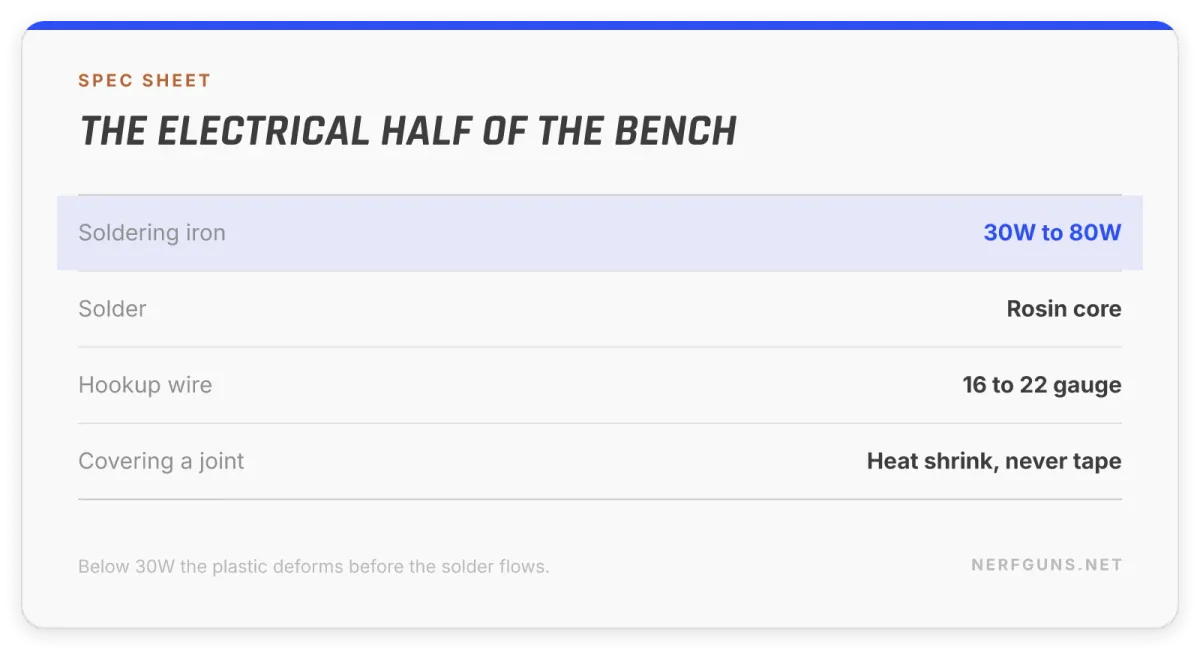
- A soldering iron, 30W to 80W. You need this the first time you replace a motor or a wire. Below 30W you will sit there heating a joint until the plastic around it deforms. You do not need a temperature controlled station on day one. You do need enough power to make the joint fast.
- Solder and flux. Rosin core solder. This is not a place to save 2 dollars.
- Heat shrink tubing, assorted. Every joint you solder gets covered. Electrical tape unwraps itself inside a hot blaster shell and then you have a short.
- Hookup wire, 16 to 22 gauge. Stock Nerf wiring is thin because it was built for stock motors. If you upgrade motors and leave the stock wire in, the wire becomes the bottleneck and it gets hot.
- Plastic epoxy, the good kind. Devcon Plastic Welder is the one that gets named in every serious mod thread, and it earns it. Super glue on ABS under spring load is a repair that fails twice: once when it lets go, and again when you find out it let go mid game.
- White lithium grease. For the plunger tube, the rails, and anything that slides. It is plastic safe, it stays put, and it makes a springer feel completely different.
- Sandpaper, 180 grit and up. For flattening a mating surface, cleaning up a cut, and prepping a shell for paint. If painting is where you are heading, the full method is in my paint guide.
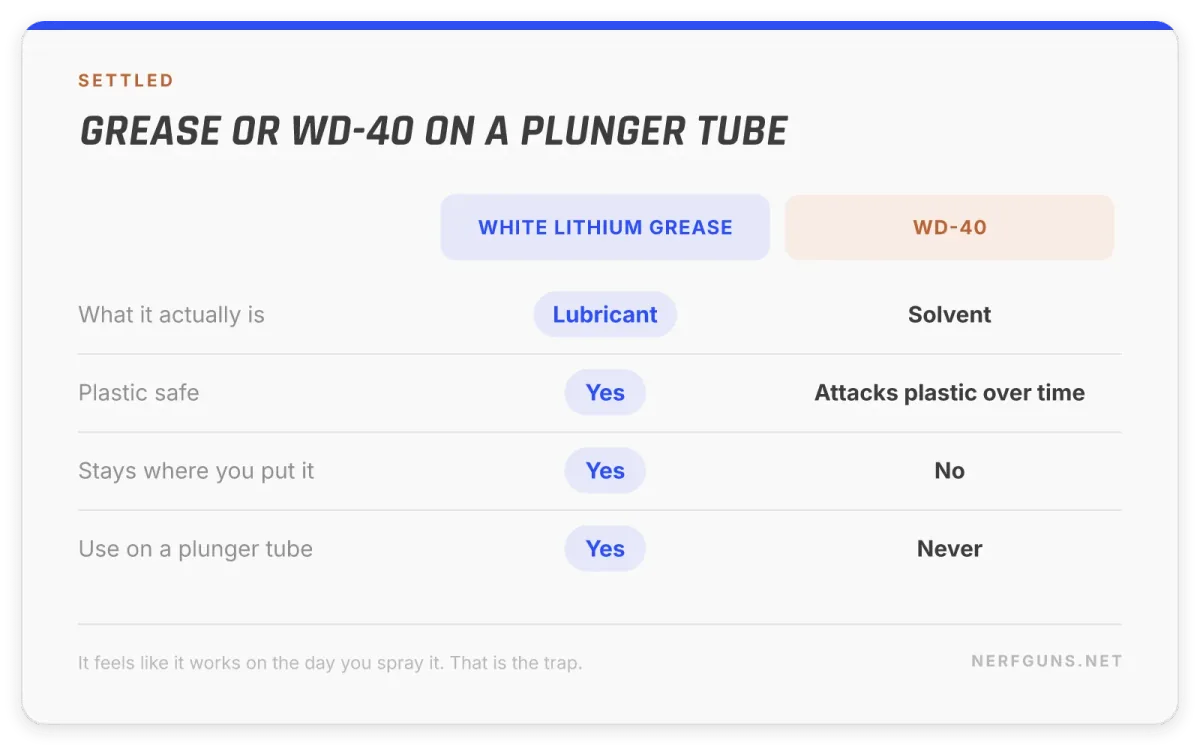
Here is the thing about the grease. Do not use WD-40. It is a solvent, not a lubricant, and it will attack the plastic over time.
It feels like it works on the day you spray it. That is the trap.
Group 3: buy these once you know you are staying
Nothing here is needed for your first mod. All of it is needed by your fifth, which is why this third of the modders toolkit can wait.
- A multimeter. The moment you are working on flywheel blasters, this stops being optional. Battery voltage under load, continuity through a switch, and whether that solder joint is actually a joint. Guessing at electrical faults wastes whole evenings.
- Helping hands, or a small vise. Soldering needs three hands. You have two.
- Barrel material: CPVC, PETG or brass. This is where barrel work starts, and it is a whole topic on its own. The comparison lives with the rest of the mod guides, because the answer depends on which dart you are running.
- Spare springs. The single highest impact upgrade on a spring powered blaster, and the one most likely to teach you that the shell needs reinforcing before the spring does.
- O-rings, assorted. A plunger that has lost its seal is a blaster that has lost half its performance, and it is a 2 dollar fix.
- A proper rotary tool. For cutting shells, opening ports, and removing material that a knife cannot reach. Buy it when you have a specific job for it, not before.
The multimeter is the one people put off longest and regret most. Every electrical problem in a flywheel blaster looks identical from the outside, and the meter is the only thing that tells them apart.
One thing worth knowing before you buy barrel material. Almost every barrel guide, dart size and spring recommendation you will read, including the ones here, quietly assumes an Elite length dart.
Nerf’s newer N Series and Loadout blasters do not use one. The Nerf Wiki describes the N1 dart as shorter and wider than an Elite dart, with a flatter head and a peg at the rear, and Amazon’s listings for those blasters say N1 darts fit N1 blasters only.
That is a bench problem rather than a shopping problem. Barrel material is sized around the dart, so an N1 blaster is a poor choice for a first barrel project, and the spare darts already in your drawer will not feed it. Blaster Hub’s coverage of the 2026 New York Toy Fair reports that the newer Rebel Ops line goes back to Elite darts, so this is a corner of the present rather than the whole future.
Nothing else in the modders toolkit changes. A PH0 is still a PH0.
What a modders toolkit actually costs
I am not going to print prices that go stale, and anything I quoted today would be wrong by Christmas. What a modders toolkit costs is better described as a shape than a number.
Group 1 is the cheapest group and it does the most work. Five items, none of them electrical, and between them they open every blaster in your cupboard.
Group 2 is where the money in a modders toolkit actually goes, because that is where the iron lives. Group 3 spreads out over a year or more, bought one item at a time as a specific job demands it.
Buy in that order and you never own a tool you have not already needed. That is the whole trick, and it is why this list is grouped rather than alphabetised.
There is one more thing worth saying about a modders toolkit, and it is the part nobody puts in a video. The tools are cheaper than the blasters they save.
A rounded screw head or a cracked shell boss costs you the whole blaster. The screwdriver that would have prevented it costs less than the darts you already own.
Your first teardown, start to finish
Here is how the whole thing actually goes, once the modders toolkit is on the bench. Read it before you pick up a driver, not during.
- Clear the bench and put a shallow box on it. Everything happens inside that box. Springs that escape it are springs you will find in a fortnight with your bare foot.
- Photograph the blaster whole, then after every screw group. You are building the reassembly guide as you go.
- Work the screws in one direction around the shell. Drop each group into its own tray compartment as it comes out, in the order you removed it.
- Lift the top shell straight up, slowly. Do not peel it. Anything spring loaded wants to leave at this exact moment.
- Find the weak spot before you change anything. A tired O-ring, a dry plunger tube, a stock wire running hot. That is your actual job today.
- Do one modification, not four. If something is wrong afterwards, you want to know which change caused it.
- Dry fit everything before glue or grease. Epoxy gives you a single attempt and it does not care how late it is.
- Reassemble in reverse photo order, then test before the last screws. Finding a mistake with 4 screws in beats finding it with 20.
That sequence is the difference between modding and gambling. None of it needs a tool from group 3.
Three things that are not on this list, and why
- A 3D printer. It is a fantastic addition and it is not a beginner tool. Get 5 mods behind you first.
- A chronograph. Necessary the moment you play at an event with an FPS cap, and pointless before that. If you are heading toward organised play, it goes on the list with the loadout gear rather than the bench gear, and that list is the HvZ loadout checklist.
- A branded “Nerf mod kit”. They exist and most of them are a screwdriver and a spring in a box at four times the price of both. Buy the parts.
The chronograph one catches people out. You do not need to measure a blaster you have not modified yet, and once you have modified it, you can work the numbers with the kinetic energy calculator before you ever stand in front of a chrono.
The order I would buy in, if the budget is tight
- Precision screwdrivers, safety glasses, parts tray. That is your first order and it opens every blaster you own.
- Flush cutters, white lithium grease, sandpaper. That is your first actual mod.
- Soldering iron, solder, heat shrink, wire. That is flywheel work unlocked.
- Multimeter, epoxy, springs, O-rings. That is you not needing to ask anybody anything.
Four orders, spread across as long as you like. Each one unlocks a category of work, and none of them strands you halfway through a job with a blaster in pieces. That is a modders toolkit built by need rather than by wishlist.
Mistakes that cost people a blaster
Every one of these has happened on my bench or on a bench I was standing next to. None of them are hypothetical, and a complete modders toolkit prevents 5 of the 6.
- Rounding a screw head on the first turn. Wrong driver, too little downward pressure. The fix is a PH0 that actually fits, and pushing into the screw harder than you twist it.
- Losing the trigger spring. It is under tension, it is small, and it goes across the room the moment the shell separates. Open the shell inside a shallow box and it cannot get far.
- Mixing up screw lengths. A long screw in a short boss cracks the shell from the inside, and you will not see it until the shell splits weeks later.
- Taping a solder joint instead of shrinking it. The tape unwraps in the heat, the joint touches the shell, and the blaster dies mid game.
- Spraying WD-40 into a plunger tube. Covered above, and worth repeating because it is the one people defend.
- Gluing before checking the fit dry. Epoxy gives you one attempt. Dry fit everything twice.
Notice how many of these are group 1 problems rather than group 2 problems. The expensive mistakes happen before the soldering iron is ever plugged in.
Take this list to the bench with you. A modders toolkit gets bought in pieces, usually while standing in an aisle deciding what is worth it today. Put your email in below, click the confirm link we send, and the checklist lands in your inbox, ready to check against what is already on your bench before you spend anything.
The newsletter comes with it. It is occasional, it is Gunner writing, and every email carries an unsubscribe link.
Gear for this checklist
As an Amazon Associate I earn from qualifying purchases. The Amazon links below are affiliate links. They cost you nothing extra and they are what keeps guides like this one being written. See our affiliate disclosure.
These are search links rather than single products on purpose, because the specific model that is in stock changes constantly and a dead link helps nobody. Every item in the modders toolkit above is in the table below, grouped the same way.
| Group | Item | Find it |
|---|---|---|
| 1 | Precision screwdriver set | Precision screwdriver set |
| 1 | Safety glasses | Safety glasses |
| 1 | Parts tray | Small parts tray |
| 1 | Hobby knife | Hobby knife and blades |
| 2 | Flush cutters | Flush cutters |
| 2 | Soldering iron | Soldering iron 60W |
| 2 | Solder | Rosin core solder |
| 2 | Heat shrink tubing | Heat shrink tubing assortment |
| 2 | Hookup wire | 16 to 22 gauge hookup wire |
| 2 | Plastic epoxy | Devcon plastic welder |
| 2 | Grease | White lithium grease |
| 2 | Sandpaper | 180 grit sandpaper |
| 3 | Multimeter | Digital multimeter |
| 3 | Helping hands | Helping hands soldering stand |
| 3 | Rotary tool | Rotary tool kit |
| 3 | O-rings | O-ring assortment |
| Ammo | Darts to test with | Nerf Elite 2.0 80 dart refill |
Frequently asked questions
What is the minimum modders toolkit to open a blaster safely?
A precision screwdriver set, safety glasses and a parts tray. That is a 3 item modders toolkit and it covers every teardown in group 1.
You can do a surprising amount with just those, including air restrictor removal on plenty of springers.
Do I need a soldering iron for my first mod?
No. Spring swaps, air restrictor removal, lubrication and shell reinforcement are all mechanical jobs, handled by the group 1 and group 2 half of the modders toolkit.
You need the iron the first time you touch a motor or a wire, and not one minute before.
What wattage soldering iron should I buy?
Something in the 30W to 80W band. Below 30W the joint takes so long that the surrounding plastic starts to deform before the solder flows.
Is a branded Nerf mod kit worth it?
Usually not. Most are a screwdriver and a spring in printed packaging, at several times the price of buying both separately.
Can I use electrical tape instead of heat shrink?
You can, and it will let you down. Tape unwraps itself inside a warm shell, the exposed joint finds something conductive, and the blaster stops working mid game.
What does a modders toolkit look like after a year?
All 19 items, plus a small pile of blaster specific spares you did not plan for. The list stops growing once group 3 is complete.
Do I need a vise for a modders toolkit, or will helping hands do?
Helping hands are enough for soldering, which is the job you actually need a third hand for.
A vise earns its place later, when you start cutting barrel material and need the work held rigid rather than just held still.
Where should I keep the modders toolkit between builds?
One box, tools in it, lid on. Split a modders toolkit across a drawer and a shelf and you will buy a second set of flush cutters inside a year because you could not find the first.
Is any of this specific to Nerf, or will general hobby tools work?
Almost all of it is general hobby gear, which is good news for the price.
The only genuinely Nerf shaped choices are the PH0 driver size, the spring stock, and the barrel material, and those are the 3 things a generic kit gets wrong.
Related pages: the mod guides, all the checklists, the paint guide, the joules to FPS calculator for when your mods meet an event cap, the LiPo safety checklist before you wire your first pack, and every Nerf gun ever made when you are choosing your next project.
It’s Nerf or Nothin’!
Building this bench over time? A free Nerf wish list is a tidy way to keep the tools and spares in one place, and to hand relatives something specific when they ask what you want.